Thursday, April 18, 2024

Celebrate Release!

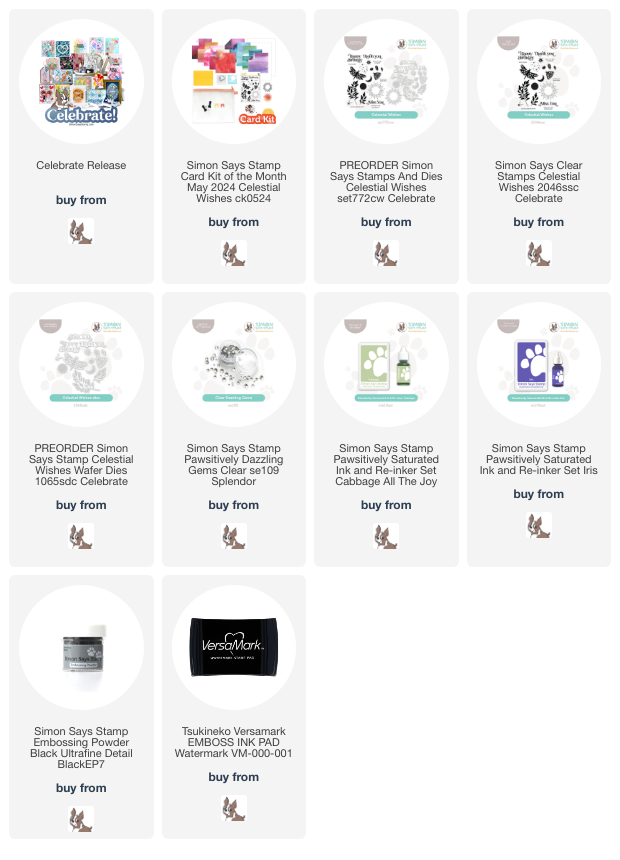
There is a brand new release out, over at Simon Says Stamp!  The release is called Celebrate, and I am starting off the "celebration", with a birthday card that I have made with the new Celestial Wishes stamp set!...
I used the burst stamp, and stamped it with eight different colored inks.  I placed the stamp in my MISTI, and taped the burst on either side of where I was stamping.  I then quickly removed the tape before stamping the inked image on the paper...
It took a little bit of time, but if you're careful, it's not hard.  I then stamped the "happy birthday over all the colors, with versamark and then black embossed.  I chose the clear gems and colored them with my markers, so the colors would match the color inks I stamped with.  Here's a close up...
I made a second card with this set, simply done...
I stamped the leaves, then chose a dark color for the flowers, and then stamped them .  I added the "thank you" with versamark and black embossing powder.  I love the shine that this gives to the sentiment!...
I hope you will check out the release over at Simon!  There are two blog hops at the Simon Blog, one tomorrow, April 19th, and on Saturday, April 20th...there will be TONS of inspiration!!  Hope you're having a beautiful day!!
Thanks for visiting me today!! Hugs!! Lisa

Wednesday, April 17, 2024

Botanic Collage

I have made  a card using the pretty Simon Says Stamp and Tim Holtz Botanic Colllage Bundle from Simon Says Stamp's Be Bold release...
This card was simply done by stamping the whole stamp on a card panel, then stamping it again on another piece of cardstock, die cutting, coloring and popping up on that flower part of the total image, onto the first panel.  I was going to add a sentiment, but loved it just as it was.  Here's a close up...
 I love that simplicity can make me so happy!  There's a new release at Simon tomorrow...hope you will check it out!!
Thanks for visiting me today!! Hugs!! Lisa

Tuesday, April 16, 2024

Ombre and Rainbow Hearts

I used the hearts and dies from the new Simon Says Stamp Tim Holtz Watercolor Bundle, from the Be Bold release,  to make a couple cards to share with you!...
This first one, I put the cling stamp in my MISTI and stamped it three times, each with a different shade of pink.  I then die cut all three sets of hearts and popped them up on a piece of Bazzill paper.  I was looking through my white cardstock and rediscovered my stash of Bazzill paper!  I used to, and still do, love the texture of this cardstock!  I added a sentiment to the panel and popped it up on a Bazzill card.  Here's a close up...

The second card, I  chose to use the row of hearts stamp, and stamped it in 11 different colors on a piece of cardstock...
My disclaimer on this card...I did not know until I cut the card down to fit with a border around the panel, that the first row of hearts was "off" from all the others.  I only realized that it was "off when I clipped down that side of the panel, and by then, well...an imperfect row made for an imperfect card, but hey...a huge step for me to even consider letting it go.  What is super weird is that all I did to stamp all the rows, was to move the paper down in my MISTI, but the stamp stayed in the same place...weird.  But here we are!  I used two sentiment strip sentiments, cut down.  Here's a closeup...
I had so much fun with these cards...hope you are having a fun start to this new week!  
Thanks for visiting me today!! Hugs!! Lisa

Thursday, April 11, 2024

Whirl Blossom Birthday

I have made a birthday card with a couple of the new dies from Simon Says Stamp's Be Bold release...
I used the pretty Whirl Blossom die along with the CZ Design Happy die for my card.  I die cut three of the flowers and brushed pink, orange, and yellow inks onto the flowers and outlines, stamping the lighter shade on the flower and the darker shade on the outline.  I die cut and layered the sentiment.  I added a scripted sentiment from the coordinating, stamping with versamark and silver embossing.  I added a Simon gem to each flower center, but used the clear gems.  I used markers to color each gem to the shade of the flower.  Here's a close up...
Hope you are having a great week, and will have a great weekend!  
Thanks for visiting me today!! Hugs!! LisaA

Sunday, April 7, 2024

Pretty Petals for Mommy

I have made a card Mother's Day, or a birthday(the inside of the card is yet to be stamped), with a beautiful Simon Says Stamp stamp/die set from their Be Bold release!...
This set is SO much fun to create with! The possibilities for colors is endless, and the end results of stamping the colors is sheer happiness!   I first stamped all the flower outline parts in black ink.  I stamped them in my MISTI so that I could stamp them more than once, if needed. I then stamped the color onto the petals and leaves.   I chose three colors of orange to stamp the colors onto the petals of the flower, and one green for the leaves.  After coloring, I die cut the flower and the stems/leaves, layered and popped up the flower onto the panel that I had stamped the sentiments.  Here's a closeup...
I made this card for my grandsons to give to give their mom(my daughter) for her birthday or Mother's Day....and although it's not a "cute" card, I liked the thought of a pretty card from them to her??!!  In any event, I loved the way it turned out...and so much fun, too!!  Hope you had a great weekend...Solar Eclipse tomorrow!
Thanks for visiting me today!! Hugs!! Lisa

Thursday, April 4, 2024

Sending Love

I have used the Lawn Fawn Giant Sending Love die, to make a giant card...
I chose to use a glossy black cardsock for the "sending", amd a glossy red metallic for the "love".  When it came to choosing a background paper, I fell in love with this older piece of paper from Honey Bee Stamps!  I could not bear to cut it down to fit an A2 card, as I would lose the yellow on the top, or the green on the bottom, so I left all but 1/4" that I cut off each side.  I added another piece of the patterned paper from this pack (Over the Rainbow) to give the card some black lines of the same width and direction as the sentiment, adhering it behind the colored card panel.  The card is 6"x6", and I made an envelope for the card with the only paper I had large enough, a kind of off white paper, and my envelope maker.  Here's a closeup of the die cut...you can kind of see the shine of the cardstock...
Simple fun...my favorite kind, this card makes me happy!  Hope your week is going good!!
Thanks for visiting me today!! Hugs!! Lisa
               

Sunday, March 31, 2024

Happy Hoppy Easter

Happy Easter!  I have made a card that I wanted to share with you , made from a Simon Says Stamp's new Be Bold release embossing folder/die set...
I used the adorable Playful Bunny embossing folder/die set.   I used a rainbow of color pieces, die cutting the bunny shapes, then putting them all in the embossing folder, and embossing them all together.  The detail and dimension they have is adorable!  I then popped them up on a card which I had stamped the sentiment on.  I added some clear drops that I had used a marker on, to adde some color to the dots to match the bunnies!  Here's a close up...
Hope you are having a wonderful Easter weekend...happiness to you!
Thanks for visiting me today!! Hugs!! Lisa

Saturday, March 30, 2024

Bestie Bracelet Birthday

I have made a birthday card with a stamped and die cut bracelet, using a cool new stamp/die set from Simon Says Stamp, and their new Be Bold release...
I don't know too much about Taylor Swift, but I have watched her Eras Tour on Disney + and DO know that bestie bracelets are huge with her fans!  I do have a couple daughters who love her(and she IS pretty amazing!!), so making this card was lots of fun.  The different stamps in the set, stamp around the die cut bracelet wonderfully, so...super simple.  I used my MISTI, and put a little adhesive on the back of the die cut bracelet, before I began stamping.  That way, not only could you position the bead stamps pretty easily, but you could also stamp the stamp multiple times, if you wanted the color a little darker(which I did).  I layered the bracelet on a piece of foam rubber and added to a textured panel with the "Happy Birthday" sentiment from the set stamped on it. Here's a closeup...
Can't beat a birthday bestie bracelet...say that 5 times fast!  Hope you are having a great weekend! 
Thanks for visiting me today!! Hugs!! Lisa

Friday, March 29, 2024

Rainbow Framed Hello

I have used a new Simon Says Stamp die set, from their Be Bold release, to make a fun card to 
share with you!  
I have used the cool new A2 Nesting Frames die set.  I kept all the frame dies attached together, and the really cool thing is that the dies, and the spaces between them, while attached, have all the same widths!  What this means is that you can use ALL the die cuts for frames...even though you kept all the dies together!  I die cut the whole set six times, with all the different colors of the rainbow.  I layered them and popped them up.  I die cut the sentiment that came with the set, cut from black glossy cardstock, layered and added a die cut and layered heart, also from glossy black.  Here's a closeup...
So much fun, and I think it looks so cool!  Hope you are having a great start to the Easter weekend...blessings!
Thanks for stopping by today!! Hugs!! Lisa

Wednesday, March 27, 2024

Happy Potted Flowers

I have made three cards with one of the pretty, fun, and new Lawn Fawn dies, Happy Potted Flower...
I just fell in love with this die when I saw it, and it does make for some happy potted flowers!  For this first one, I simply die cut the pieces with white and colored pieces, the pot I used a blending brush and some terracotta ink for the edges.  I used a piece of burlap to texture the yellow center.  I also used a couple layers over the top, after adhering the pieces onto the base.  I used an older Simon stamp set for the sentiments...so sorry, I didn't realize it was no longer available umtil after my cards were finished...but any small sentiment stamps would work!  Here's a close up...

The other two are just like the first, but different colors, and the next one, a different sentiment...
This one was truly the flower after the die's name...the Happy flower...rainbows always make me happy!!  Here's a close up...

This one for a sunflower loving family member...
...and it's closeup...
Sweet and simple...the flowers and my heart are happy!!
Thanks for visiting me today!! Hugs!! Lisa

Saturday, March 23, 2024

Be Bold Blog Hop - Day 2!


I am beyond thrilled to be a part Blog Hop day 2 of the celebration of Simon Says Stamp's newest release, Be Bold!!  I have chosen to make four cards...all using one of the wonderful new sentiment dies, one card also with a new embossing folder and one card with a new sentiment stamp! 
I have to say, up front, I LOVE this sentiment die!  The font for this "Happy Birthday" die is cool, pretty, and, well...kind of perfect!  I simply chose a piece of patterned paper that I have also fallen in love with, for the background.  I layered the sentiment, and added a sentiment from one of the new sentiment stamp sets after adding a layered heart to dot the "i".  I framed the pretty paper with gold cardstock and popped up the panel on the card.    Here's a close up...

Then...my daughter asked me for a birthday card for her father-in-law, and that began the thought for the next three cards!...
I found, as I looked for a birthday card for my daughter, that I had no masculine looking birthday cards in my stash of cards!!  SO....I decided that I would make some cards that would be void of flowers and yet be "enough", though I wanted to keep them CAS!!  Before I go on... men can and do love flowers and pretty colors...but some don't.  These cards are for the latter.   This sentiment proved to be really cool, because although it is called Fancy Happy Birthday, I think that with the right background, the fancy perfectly fits any birthday card!!  I paired this gold embossed and layered sentiment , with a background made with an embossing folder that I had embossed, then brushed on three colors with a blending brush.  Popped up on card, here's a close up...

The second one, I used another piece of patterned paper with the layered sentiment ...
This piece of paper was from an 8"x8" pack of paper.  The sentiment is again, layered and this time framed with a piece of Simon Champagne metallic cardstock. I popped it up, here's a close up 
The third one is actually the first guy card I made...
I used a Simon stencil set, with three shades of Simon gray ink.  I die cut the sentiment with Simon black glossy cardstock, and layered.  The panel is popped up on the card.  Here's a closeup...
Okay...I had SO much fun making my many cards, it's always so nice to have some guy cards for birthdays!!  My fun was above, your fun is below!!

Simon is generously giving a $25 coupon to every stop on the hop from our comment sections, so the more hop blogs you comment on, the more chances you will have to win!  Winners will be chosen and posted on the Simon Blog on Wednesday, March 27th, so make sure you check the Simon Blog on the 27th, to see if you are a winner!!  If you are a winner, you can email Simon to claim your prize!
The list of participants in today's hop are listed below...
Two things before I end my post...There was a Day 1 hop, yesterday, so I hope you will check it out at the Simon Blog!  There is a whole bunch more inspiration and more chances for you to comment and possibly win one of the $25 coupons!
The second thing, please don't forget about the offer in the banner at the top of my post!  The offer is for $7 off your purchase of $40 or more!  Simply use the code GREEN at checkout!  The offer is good until the end of the day on March 24th, that's tomorrow, so don't wait!!
Thank you so much for stopping by, and please keep on hopping! 
Hugs!  Lisa

Thursday, March 21, 2024

Be Bold Release Cherry Blossoms

There's a new release out, over at Simon Says Stamp, it's Be Bold!  I have made a cards with one of the beautiful new embossing folder/die sets, and a sentiment from a new stamp set!...
I used the ne Cherry Blossom Embossing Folder/die set, and the Pretty Petals stamp set for the sentiment.  I used an older die for the branch and leaves, Delicate Leafy Branch.  I die cut the flowers, then embossed them in the folder.  I then colored them with markers, and adhered them around the branch, that I had also colored with markers.  I added the sentiment and popped up the panel on the card.  Here's a close up...
I hope you will check out the new release over at the Simon website! There will also be two blog hops, one tomorrow, the 22nd, and a second one on Saturday, the 23rd...Hope you will hop along!!
Thanks for visiting me today!! Hugs!! Lisa